
The Dashboard
The Dashboard is the first screen you see after signing in. Every agent in your workspace lives here, and you’ll keep coming back to it: checking activity, jumping into a chat, opening an agent’s settings.
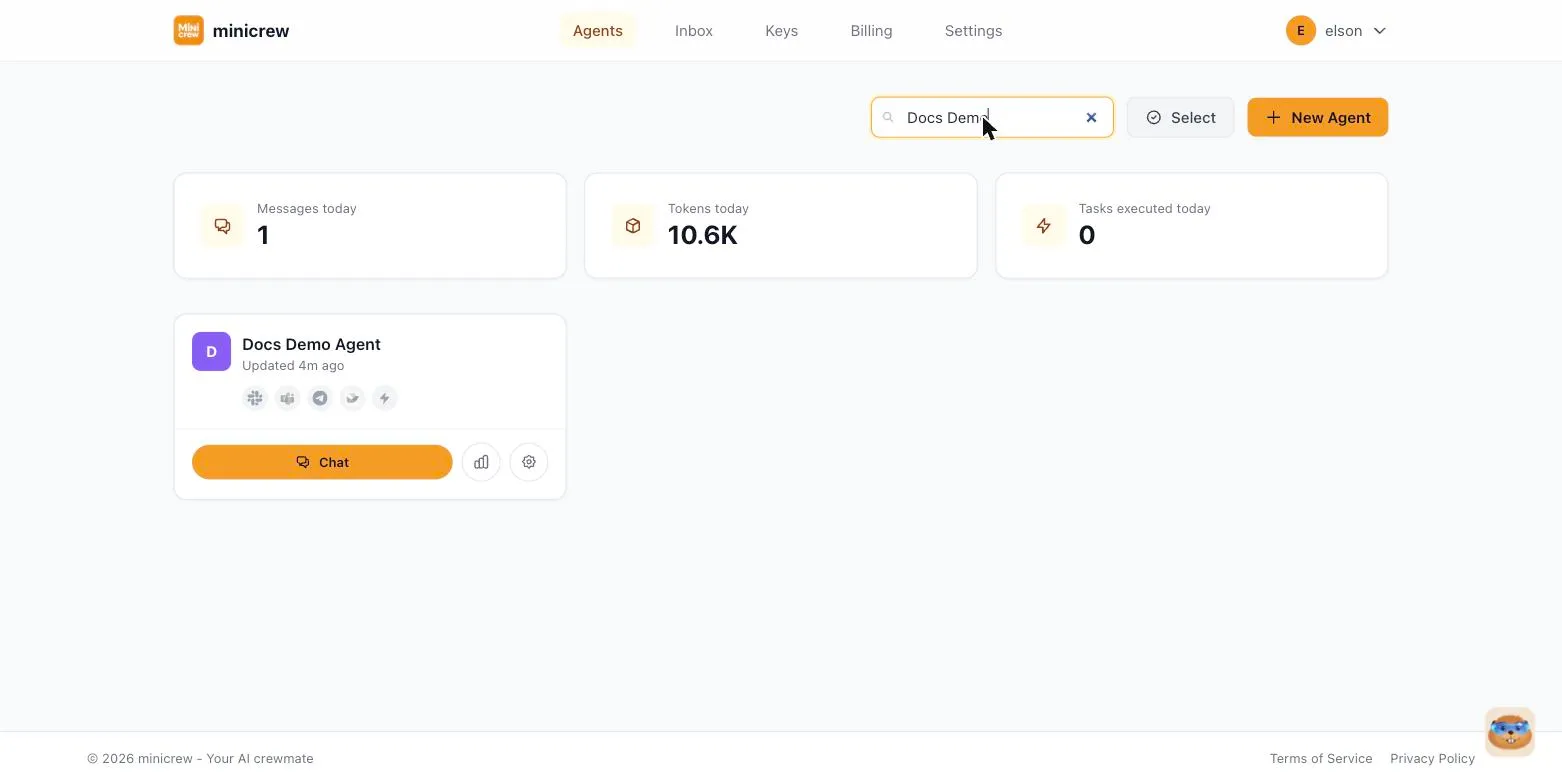
Today’s summary
Section titled “Today’s summary”At the top of the Dashboard (once you have at least one agent) you’ll see three summary cards covering activity across all your agents for the current day:
- Messages today — how many messages your agents have exchanged with customers today.
- Tokens today — a measure of how much “thinking” your agents have done today, combining what they read and what they wrote.
- Tasks executed today — how many background actions your agents completed, such as looking something up or updating a record.
These numbers reset each day. Treat them as a quick pulse check, not a full report — for a detailed breakdown per agent, open that agent’s Analytics page.
Finding an agent
Section titled “Finding an agent”Once you have more than a couple of agents, a search box appears next to the New Agent button. Type any part of an agent’s name and the list narrows instantly. While you’re searching, matches show as a flat list, not grouped, so nothing gets buried.
Select mode
Section titled “Select mode”A Select button shows up once you have two or more agents. Turn it on and a checkbox appears on every card, letting you pick several agents at once. Right now that’s used for exactly one thing: combining agents into a new group (see Organizing Agents into Groups). To leave selection mode, click the same button again — it now reads Cancel.
Creating an agent
Section titled “Creating an agent”The New Agent button opens the agent creation wizard. See Creating an Agent and the Quick Start guide for the full walkthrough.
The empty state
Section titled “The empty state”Brand-new workspaces show a welcome screen instead of a card grid. It explains in plain terms what an agent does (chats with customers, books appointments, answers everyday questions) and gives you one prominent button to create your first agent.
Agent cards
Section titled “Agent cards”Every agent in your workspace is shown as a card with:
- Avatar and name. Click the name to open the agent’s settings.
- A row of channel icons (Slack, Teams, Telegram, Lark, and API). The same six appear on every card, in the same order. Channels you’ve turned on show in full color; the rest sit grayed out. Hover one to see the channel name and connection status.
- “Updated…” shows how long ago the agent’s settings last changed.
- A small group chip if the agent belongs to a group — click it to remove the agent from that group.
Card buttons
Section titled “Card buttons”Each card has three actions along the bottom:
- Chat — opens the test-chat page for that agent, so you can try it out yourself.
- Analytics (chart icon) — opens the agent’s usage analytics.
- Configure (gear icon) — opens the agent’s settings, where you edit its persona, channels, skills, and more.
Hover a card and a trash icon appears in the top-right corner for deleting the agent. See Creating an Agent for what deleting actually does.